High-Frequency Flicker Reduction
G button UC photo shooting menu
Selecting [
Flicker may cause banding in pictures taken under high-frequency LED lighting or in shots that include monitors with high-frequency LED displays. Reducing the size of the increments used for shutter-speed selection helps in identifying speeds that keep flicker to a minimum.


- After choosing a shutter speed suited to your subject, enable high-frequency flicker reduction and fine-tune shutter speed while viewing your subject in the shooting display until you find a value that minimizes flicker and banding. The effect can be more readily ascertained by zooming in on your subject using display zoom.
- When high-frequency flicker reduction is enabled, the shutter speed display shows only the denominator, with a digit added after the decimal point.
The precise shutter speed is shown. For example, the shutter speed when ¹⁄₅₀₀ s is selected is precisely ¹⁄₅₁₂ s, which the display shows as “512.0”, the denominator.

- Turning high-frequency flicker reduction off returns shutter speed to the nearest of the values normally displayed.
Cautions: High-Frequency Flicker Reduction
- The effects of flicker in the shooting display may differ from those seen in photographs. We recommend that you take test shots to identify the shutter speed that minimizes flicker and banding.
- Exposure maintenance is disabled while high-frequency flicker reduction is in effect, even when [Shutter speed] is selected for Custom Setting b7 [Keep exp. when f/changes].
Using “Recall Shooting Functions” with High-Frequency Flicker Reduction
Selecting [Save current settings] for Custom Setting f2 [Custom controls (shooting)] > [Recall shooting functions] or [Recall shooting functions (hold)] while high-frequency flicker reduction is in effect saves the shutter speed currently selected via fine-tuning. This allows you to, for example, identify and save the shutter speed that minimizes striping in a high-frequency LED display and then instantly recall the stored value using the selected button only when the LED display is in the frame.
Set a Frequency for the Light Source
You can set a frequency according to the light source. Do so either by using a camera control in the shooting display (frequency setting mode) or using the [High-frequency flicker reduction] item in the photo shooting menu.
- Once you have configured a frequency, only values that are integer multiples of the cycle of the configured frequency can be selected for the shutter speed. The shutter speed can be changed without affecting the flicker reduction effect.
- Since the frequencies of LED lighting and high-frequency LED displays vary from product to product, you can save multiple frequencies that are tailored to each product and switch between them as needed.
- Four frequencies are set from [PRE1] (7680 Hz) through [PRE4] (1920 Hz) by default. These frequency values can be adjusted.
- If you configure a frequency, the shutter speed should be slower than 1/(frequency) s.
Switching the Frequency
Four default frequency settings are available. Assigning [High-frequency flicker reduction] to a control in Custom Setting f2 [Custom controls (shooting)] allows you to switch frequencies while viewing the shooting display.
Assign [High-frequency flicker reduction] to a control using Custom Setting f2 [Custom controls (shooting)].

Press and hold the control assigned to [High-frequency flicker reduction].
The camera will enter frequency setting mode.

Switch the frequency.
- Rotate the sub-command dial to switch between [PRE1], [PRE2], [PRE3], [PRE4], and [OFF].
[PRE1] through [PRE4] are configured to the following frequencies by default. Reduce the flicker effect by selecting a frequency suited to the light source or high-frequency LED display.
- [PRE1]: 7680 Hz
- [PRE2]: 3840 Hz
- [PRE3]: 2880 Hz
- [PRE4]: 1920 Hz
- If none of the options from [PRE1] to [PRE4] reduces the flicker effect, adjust the frequency value (0Adjusting Frequency Values).
- When you select [OFF], the camera will use the default frequency value.
- Pressing the shutter-release button will not take a picture while in frequency setting mode.

Press J to exit frequency setting mode.
Exit frequency setting mode and return to the shooting display.
Cautions: Configuring for High-Frequency Flicker Reduction
- Even if you have configured a frequency, the flicker effect in the shooting display may differ from those seen in photographs.
- Even if you have reduced the flicker effect by configuring a frequency, the flicker effect may return after changing the shutter speed.
- We recommend that you take test shots to identify the shutter speed that minimizes flicker and banding.
Adjusting Frequency Values
You can adjust the frequencies configured for [PRE1] through [PRE4].
Press and hold the control to which [High-frequency flicker reduction] is assigned to enter the frequency setting mode.
Select an option from [PRE1] through [PRE4] to adjust the frequency.
Press the DISP button.

Enter the frequency value.
- Press 4 or 2 to highlight digits and press 1 or 3 to change.
- The frequency can be set between 30 and 9999 Hz.

Press the DISP or the J button.
- Press the DISP button to save the frequency and return to the frequency setting mode.
- Press the J button to save the frequency, exit the frequency setting mode, and return to the shooting display.

Using the Photo Shooting Menu
You can configure the frequency from [High-frequency flicker reduction] in the photo shooting menu.
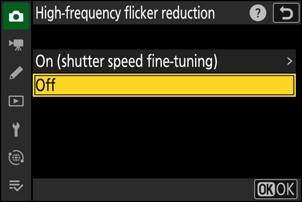
Highlight [High-frequency flicker reduction] in the photo shooting menu and press 2.

Highlight [On (shutter speed fine-tuning)] and press 2.
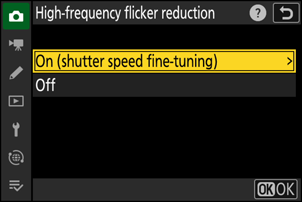
Select a frequency from [PRE1] through [PRE4], or [Off], then press J.
- Changes will be saved and the [High-frequency flicker reduction] menu is displayed.

- The current frequency setting will be displayed in the [High-frequency flicker reduction] menu.

Adjusting the Frequency from “High-Frequency Flicker Reduction" in the Photo Shooting Menu
Highlight an option from [PRE1] through [PRE4] in [High-frequency flicker reduction] > [On (shutter speed fine-tuning)] and press 2 to adjust the frequency.
- Press 4 or 2 to highlight digits and press 1 or 3 to change.
- The frequency can be set between 30 and 9999 Hz.
- Press the J button to save the frequency and return to the menu.

Resetting the Frequency Values
The values for [PRE1] through [PRE4] can be reset using [High-frequency flicker reduction] > [On (shutter speed fine-tuning].
- Press O (Q), highlight [Yes], and press J to reset the frequencies to their default values.
